Stitching Nurbs Patches
This feature is still in an early stage of development so please be prepared for unexpected results and make back ups of any work you don't want to loose before manually stitching patches.
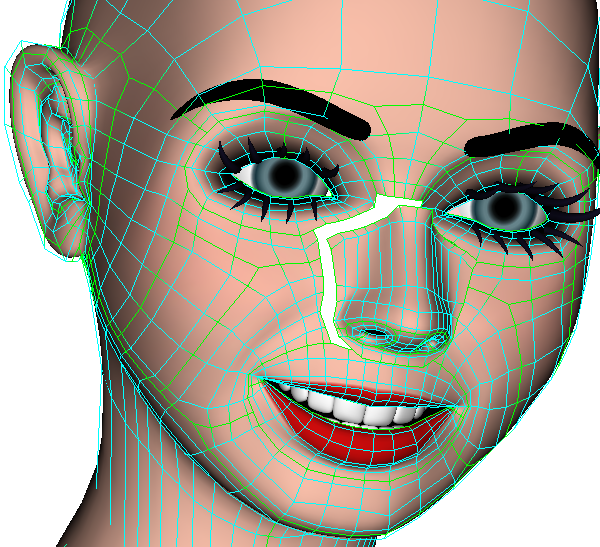
Although it is beneficial to understand how models are made up of patches, it is not essential for the artist to have an understanding of what NURBS patches are to be able to model a structure as complex as a human head. Even when manually stitching patches together the artists does not need to know what patches are. For example to stitch this head to this body:
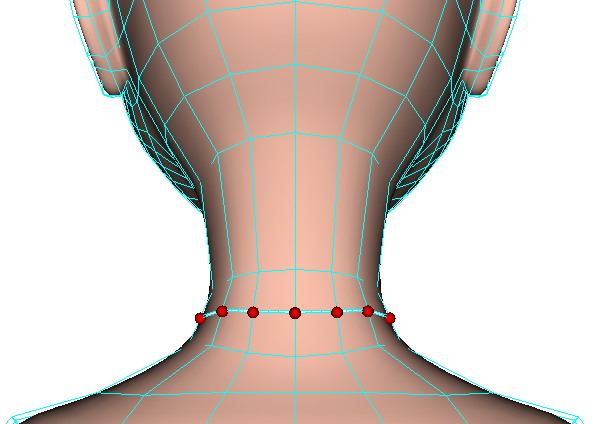
the artists just needs to select the points from one of the joining edges and click  to stitch.
In this simple scenario, all of the points can be selected using the select ring feature and stitched all in one go so long as all the points to be joined are close enough aligned to each other.
to stitch.
In this simple scenario, all of the points can be selected using the select ring feature and stitched all in one go so long as all the points to be joined are close enough aligned to each other.
If the head is joined and we want to cut the head from the body we can click  to cut. The task of cutting is performed much the same way as inserting a control line. Before we click the ok button we may want to check the continue check box so that the cut continues from one patch to another to ensure our cut will loop right around the neck in the case of it being made of multiple patches. If we want to be able to drag the points where the cut is made, check the unstitch check box, otherwise, though the patches will be cut (if not already cut), they will remain stitched together.
After joining the head to the body we see that the control points we joined are no longer visible, this is because the points we joined belonged to edges of patches which by default are hidden from view when stitched to other edges. To see patch edges regardless of if the edges are stitched, toggle seamless into show patch border mode by clicking 
In this mode the borders of each patch are shown by the green lines making it easy to see how the structure of our model is built from patches.
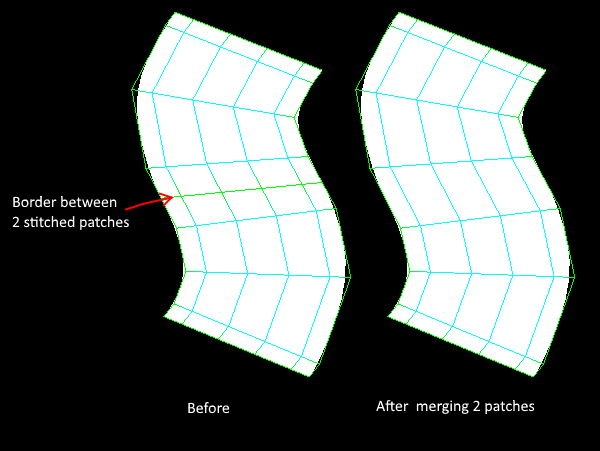
We can merge 2 patches to form a single patch if the 2 borders have a matching number of control points. Merging can be done by clicking  and then clicking on the border.
This may achieve much the same result as stitching 2 patches together but note it is different in that merging patches reduces the number of patches in our model where as stitching patches together does not change the number of patches.
For the types of scenarios shown so far, stitching patches is very easy. For more challenging tasks it generally helps to toggle into stitch poly mode by clicking 
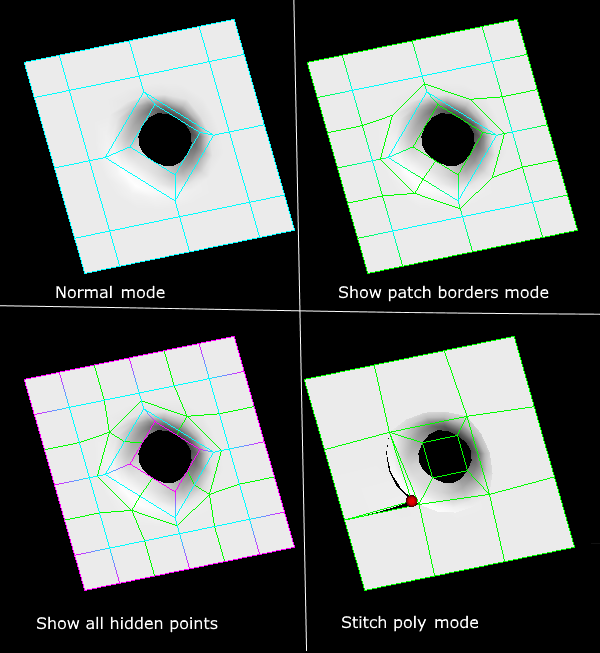
Stitch poly mode lets us be able to select all the necessary points needed for stitching patches while hiding other points that would only clutter our view. The polygons that are displayed while in this view makes it easy for us to use concepts common with polygon subdivision modelling.
Although we wont be generating shapes exactly the same as subdiv with these polygons as we are using nurbs patches in reality, stitch poly mode lets us work with polygon structures that are essentially the same as if we were using the subdiv method.
Unlike other modes, stitch poly mode lets us select stitched points by clicking on them and unstiching them, by clicking 
Note: In stitch poly mode we can only drag points that are on the border of a patch but these are the only points we really need to drag when stitching patches.
[3d Modelling Software] [Tutorials] [Forum] [Features] [Download] [Gallery] [FAQ] [Worlds] [Avatars] [Links] [Thyme]