Getting Started Using the Item Bar
Constructing a model from importing pre-set items is a fun easy way to get started using Seamless3d.
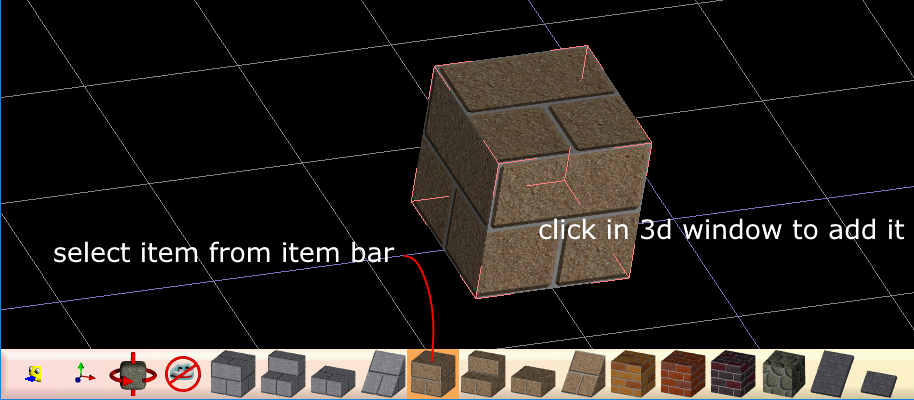
After starting Seamless3d, click ![]() to open the item bar set for items to snap onto a 1 by 1 meter grid.
to open the item bar set for items to snap onto a 1 by 1 meter grid.
To change the orientation of your view, drag with the right mouse button held down and to pan your view, click on empty space and drag with the left control key held down. If there is no empty space, hold down both the left control and Alt keys.
Zoom in and out using the mouse wheel.
Immediately after adding an item, the new item will be a selected item in the 3d window.
Click ![]() to centre your view around the selected item.
to centre your view around the selected item.
Click ![]() to rotate the selected item (around the Y axis).
to rotate the selected item (around the Y axis).
 Click
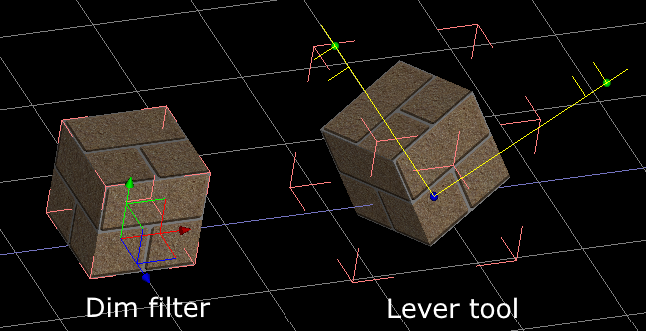
Click ![]() to show or hide the dim filter. Press L to show or hide the lever tool.
The dim filter lets you move the position of the selected item.
The lever tool lets you rotate the selected item in relation to your view.
You can restore the orientation of the selected item by clicking
to show or hide the dim filter. Press L to show or hide the lever tool.
The dim filter lets you move the position of the selected item.
The lever tool lets you rotate the selected item in relation to your view.
You can restore the orientation of the selected item by clicking ![]()
Click ![]() to toggle out of "click to add" (AKA "click to import") mode. This lets you select an item in the 3d window by clicking on it.
An item can be selected while in "click to add" mode if you hold down the left control key while clicking on the item.
to toggle out of "click to add" (AKA "click to import") mode. This lets you select an item in the 3d window by clicking on it.
An item can be selected while in "click to add" mode if you hold down the left control key while clicking on the item.
All of the textures for the items you add, are added as external png files to the folder your smls file is located in. Because the items are added as local files, the textures will not be seen if you copy or move the smls file to a new folder without copying or moving the texture files with the smls file. Note that if you add items and then save the smls file (via "save as") to a different folder, the textures will not be copied or saved to the different folder so it may be wise to save the smls file to the desired folder before adding any items.
[3d Modelling Software] [Tutorials] [Forum] [Features] [Download] [Gallery] [FAQ] [Worlds] [Avatars] [Links] [Thyme]