Ray Tracing the Frames with POV-Ray
- Making 3D Animated Movies with Free Open Source Seamless3d and FFmpeg
- Ray Tracing the Frames with POV-Ray
- Adding a Sound Track
- Recording Sound with Audacity
- Moving the Camera (being updated, will be ready soon)
Because the frames for movies don't have to be generated in real time we can take advantage of using ray-tracers such as Pov-Ray to render the individual frame images. This takes more time for the computer than taking screenshots but POV-Ray offers greater control over the lighting in our scenes. With it we can make beautifully complex shadowy scenes with very little effort on our part. Pov-Ray is free open source software and can be downloaded from http://www.povray.org/download/.
For this tutorial you will need POV-Ray 3.7, Seamless3d 3.009 or up and the FFmpeg installer for Seamless3d 64 bit installed.
Create the frames for POV-Ray
The animation created for a future tutorial: Creating a Simple Realistic Animated Female Step by Step will be used as an example for this tutorial. You can download the example file from this link: simple-realistic-animated-female.zip
Unzip and put the simple-realistic-animated-female.smls file in a new empty folder and double click it to open it into Seamless3d:

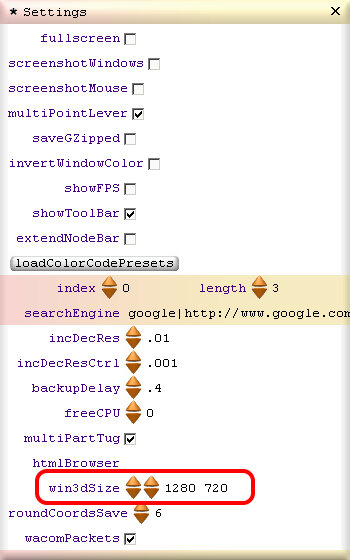
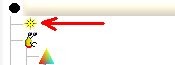
Set the resolution of the frames to 1280 by 720 pixels by setting the Seamless3d window to this pixel size. To do this click ![]() to open the settings control panel and set the win3dSize field to 1280 720:
to open the settings control panel and set the win3dSize field to 1280 720:
If the window size was not already set to this size, close down seamless and reopen (and the file) again for the window size specification to take affect.
Select export->movie in the file menu and check the povRay check box in the ExportMovie control panel:
This causes a PovLight node to be inserted as the first node in the Scene:
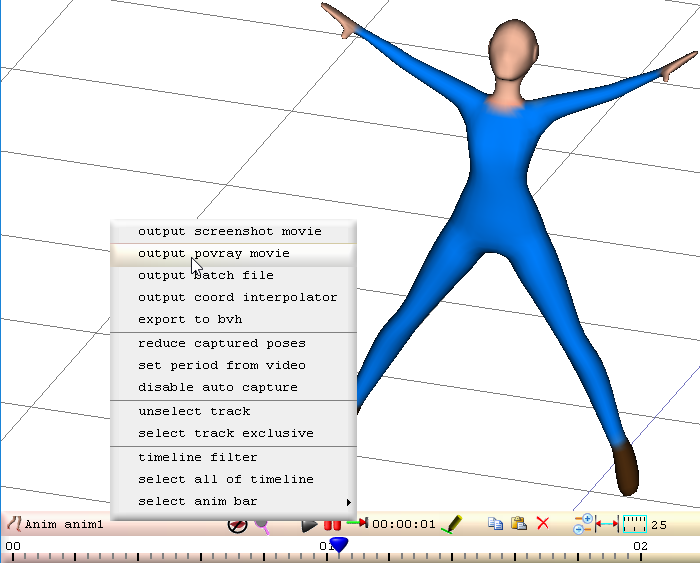
Click ![]() to go into animation mode and right click on the Anim bar and select, output povray movie:
to go into animation mode and right click on the Anim bar and select, output povray movie:
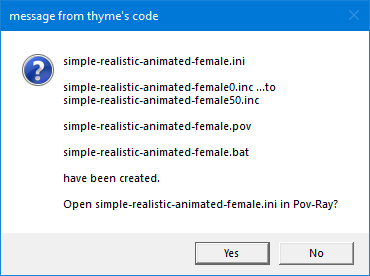
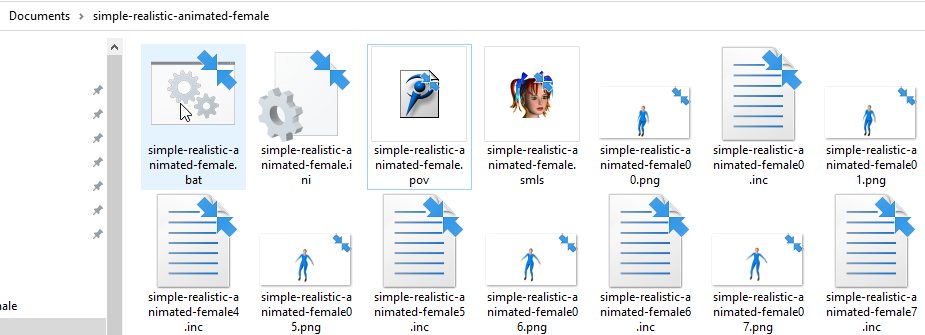
When done we will get a message showing we have created the following files:
- An ini file which contains information such as the number of frames and the type of image file to create
- 51 inc files which contain the geometry and light source for the frames
- A pov file which specifies the inc frames
- A bat (batch) file containing the command line for FFmpeg
and we are prompted to open the ini file in Pov-Ray, click Yes:
If we are prompted to enable the POV-ray editor we can click Yes:

and install the editor file after it has downloaded. Then this prompt will not show again after we output to POV-ray and POV-ray will automatically be opened with the ini file (simple-realistic-animated-female.ini). Alternativly we can drag the ini file into POV-ray to open it without installing the editor but without the editor we have to do this each time we want to render a movie. After installing the editor we will need to repeat outputting to POV-ray or open the ini file into POV-ray manually this one time.
Render the frames
Set POV-Ray's resolution to 1280 by 720 or 1920 by 1080 and make sure AA.03 is selected:
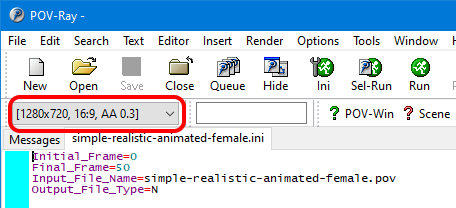
AA (Anti Alias) smooths out the pixels very nicely.
Note we can render in POV-Ray with 1920 by 1080 resolution when exporting from Seamless with a 1280 by 720 window size because the ratio is the same.
Click Run  and let POV-Ray render the frames.
Convert the png files to an mp4 file
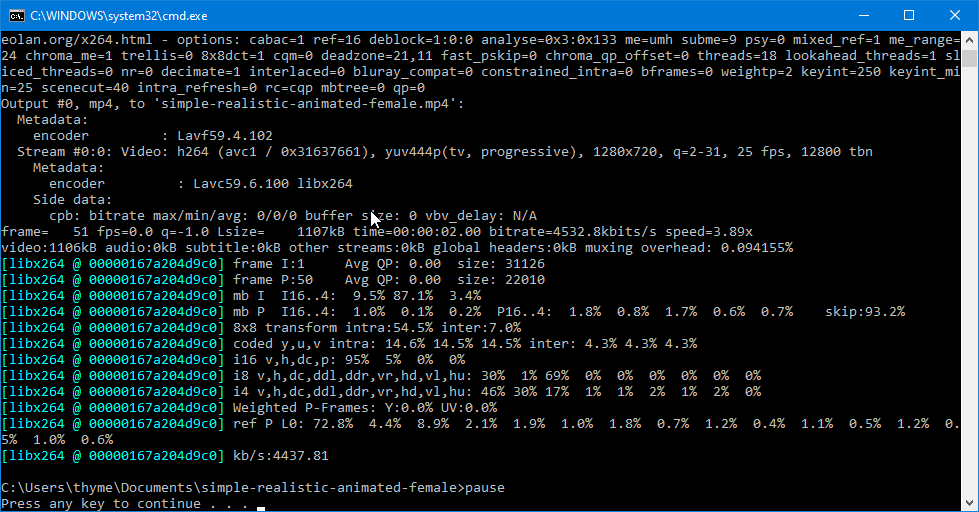
Open the folder containing the files using windows explorer and run the batch file (simple-realistic-animated-female.bat) by double clicking it:
The batch file will run FFmpeg with the command to create our file simple-realistic-animated-female.mp4 from the png files.
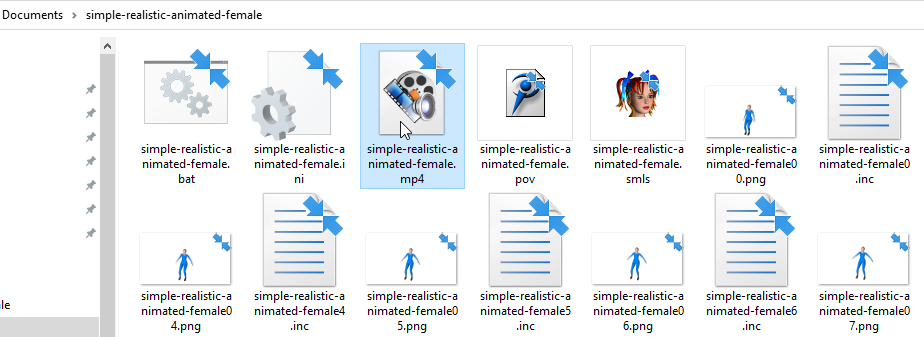
When done:
the simple-realistic-animated-female.mp4 movie file will be added to the folder that contains the png images:
Setting 4k Resolution For POV-Ray
Because POV-Ray does not have 4k resolution already set up we must edit one of POV-Ray's ini files if we want to make a 4k movie but fortunatly this is very easy to do. Open the folder Documents\POV-Ray\v3.7\ini and open the file quickres.ini into a text editor (the POV-Ray text editor will do). Copy the folowing text:[3840x2160, AA 0.3]
Width=3840
Height=2160
Antialias=On
Antialias_Threshold=0.3
and paste it into the end of the ini file.
Save the file and now when you open Pov-Ray (you must close POV-Ray before opening it) you will be able to select 3840x2160 resolution:
[ [3d Modelling Software] [Tutorials] [Forum] [Features] [Download] [Gallery] [FAQ] [Worlds] [Avatars] [Links] [Thyme]